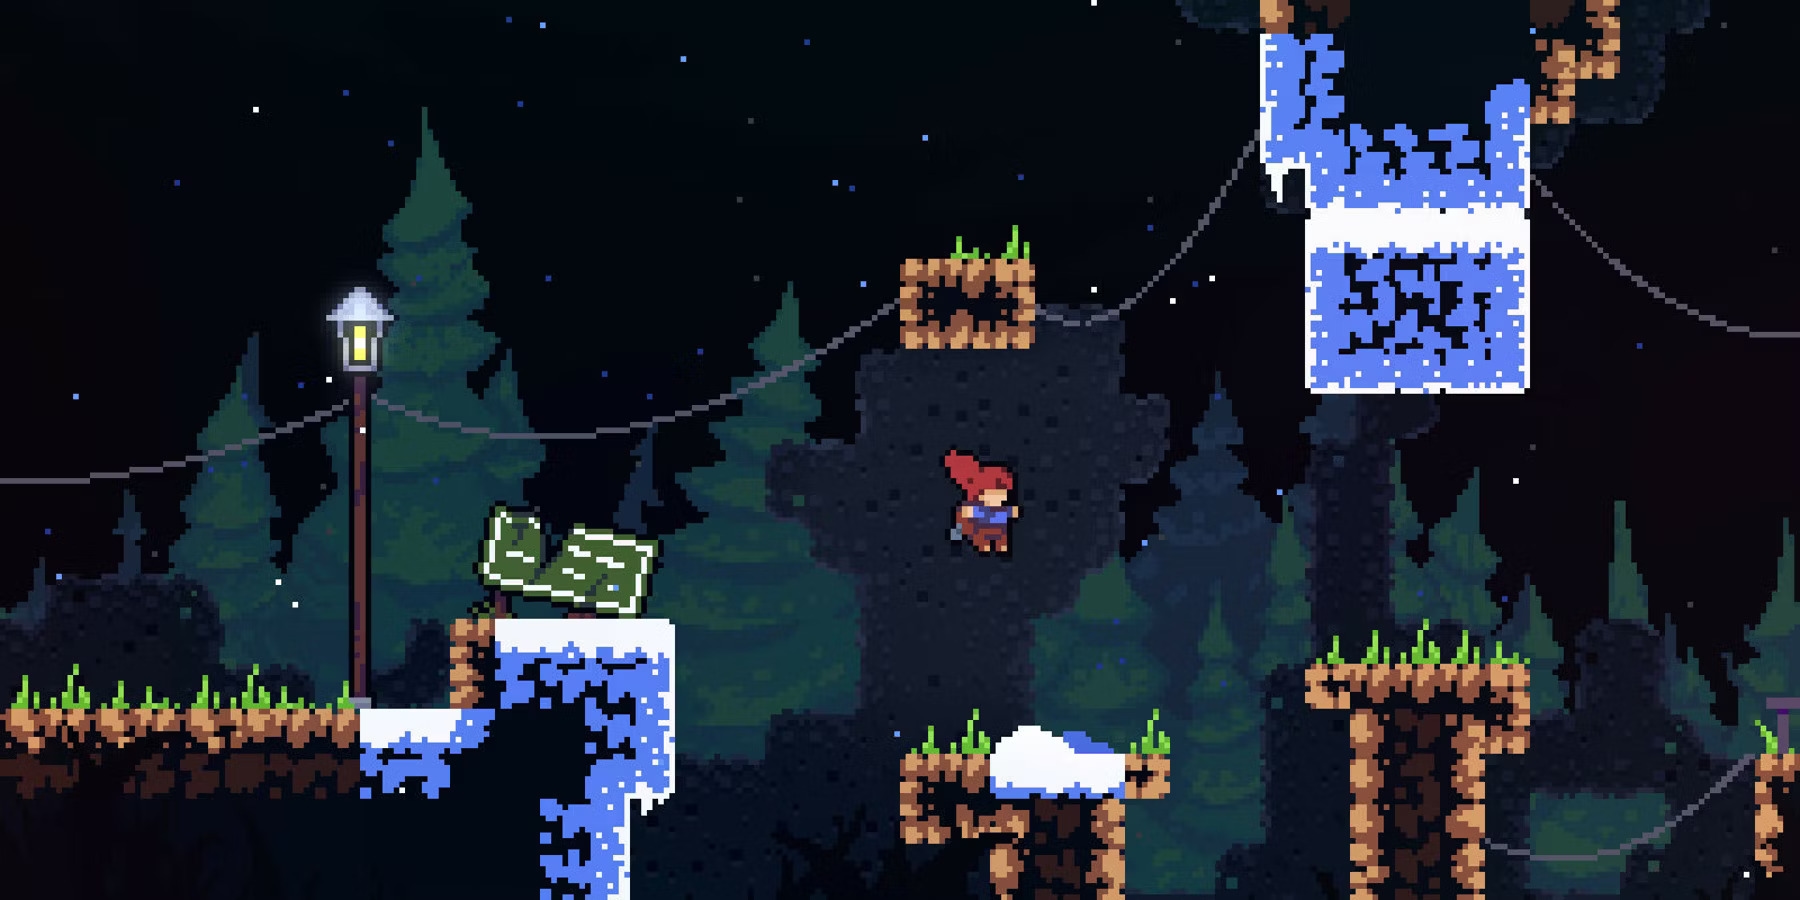
The Invisible Helping Hand
That high jump that looks ‘juuuust out of reach’ is actually pretty easy to clear when the invisible hand is there to help you the rest of the way up. Sometimes when you're platforming though, its absence makes it seem as if you are playing worse than you may perceive. This is pretty frustrating, and can lead to situations where you’re telling yourself (and maybe the game) things like:
- “I can definitely reach up there!”
- “I definitely jumped at the right time!”
- “How did I even get stuck on that!?“
If you’ve ever thought one of these to yourself, it's because you’ve encountered? a rough edge. The Invisible Helping Hand rounds off these rough edges to make your journey through the video game as frictionless as possible. That high jump that looks ‘juuuust out of reach’ is actually pretty easy to clear when the invisible hand is there to help you the rest of the way up.
Today, I’m going to help you understand how to craft your own hand with your own fingers.
Ledge Edge Cases
Sometimes, when slowly walking off a ledge, it’s possible to end up getting caught on a corner, stuck in a strange state where the character believes that it is falling, but there’s just enough friction to actually keep the character on the ledge.

The capsule’s grounding raycast isn’t hitting the cube platform, and yet the player is not falling due to the capsule sticking on the corner.
Instead of going into the code that keeps us on the ground, my preferred solution to this problem is to actually just ‘push’ the player the rest of the way off of the ledge by adding a small amount of velocity relative to the player’s forward direction. You really only need to add enough to make that invisible hand gently push the player into that bottomless pit you just so ‘happened’ to install right there.
“But what if I didn’t want to get pushed!? I wanted to make the jump at exactly the last possible moment!” Well let me tell you about an old American cartoon called Looney Tunes and its conception of a popular video game mechanic, Coyote Time.
Coyote Time
Aptly named after Looney Tunes’ Wile E. Coyote, any time this animated mammal runs off a ledge, he is completely unaffected by gravity and able to move however he wants… Until a second passes and he realizes that he’s been performing physics crimes, at which point he’s suddenly snapped back to reality (ope there goes gravity) and is swiftly taken to the ground.
How this actually applies to video games, is letting your character perform their jump (or another applicable action) if they’ve been off of the ledge for a short amount of time. How long your character’s coyote time lasts is mainly dependent on your game’s feel, I’ve made games with anywhere between 0.05 - 0.2 seconds. Although it seems like an insignificant amount, changing your timing from a 60th to a 20th of a second is enough to make a huge difference (3x if you care to count).

So we’ve been pushed over the ledge, and performed our coyote time jump—it’s time to hit the ground properly. There’s some kind of low obstacle up ahead that requires us to jump as soon as we land (maybe the ground is hot and hurts if we stand on it for a short amount of time).
We need to be able to time our jump to minimize the amount of time on the ground. I pressed my jump button “the exact moment” we touched the ground, but I didn’t jump! What gives?
What actually happened was that we pressed the jump button one frame before we landed, and the game just ate our input. How delightful. This small point of frustration can be resolved by measuring our input over time instead of a single instance, also known as Input Buffering.
Input Buffering
The big idea behind Input Buffering is changing from “if this button was pressed this frame” to “if this button’s value is greater than 0”. This is accomplished by creating a helper script that takes your inputs, and assigns an amount of time you’d like that button press to remain valid. This catches inputs that were pressed a little too early, so a frame perfect input is not required to perform a frame perfect action.
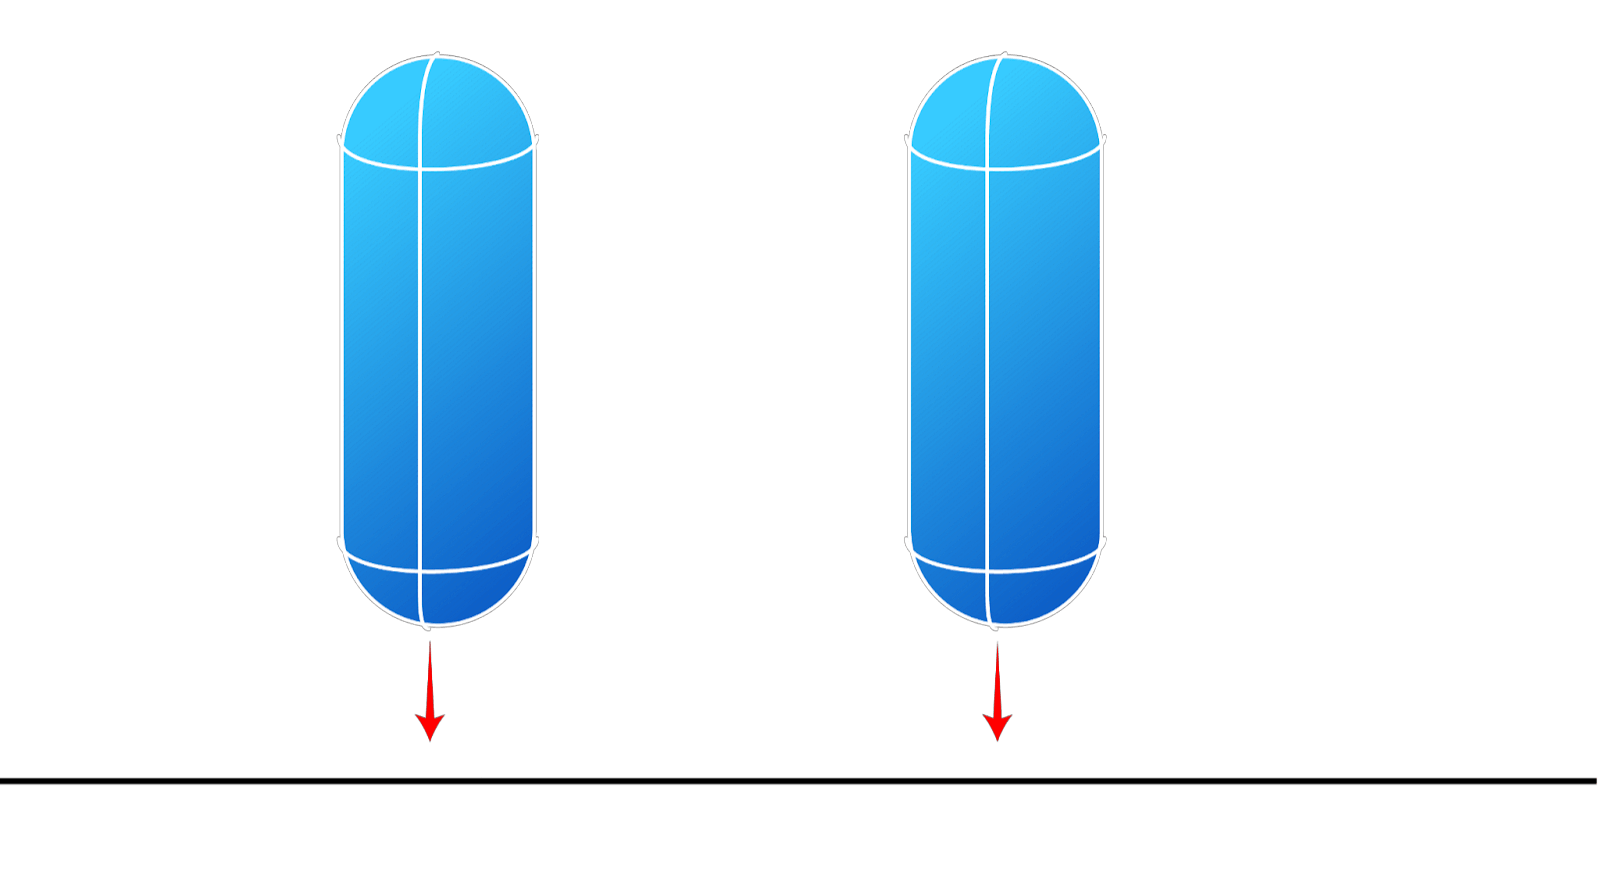
Both capsules have pressed the Jump button at the same frame.
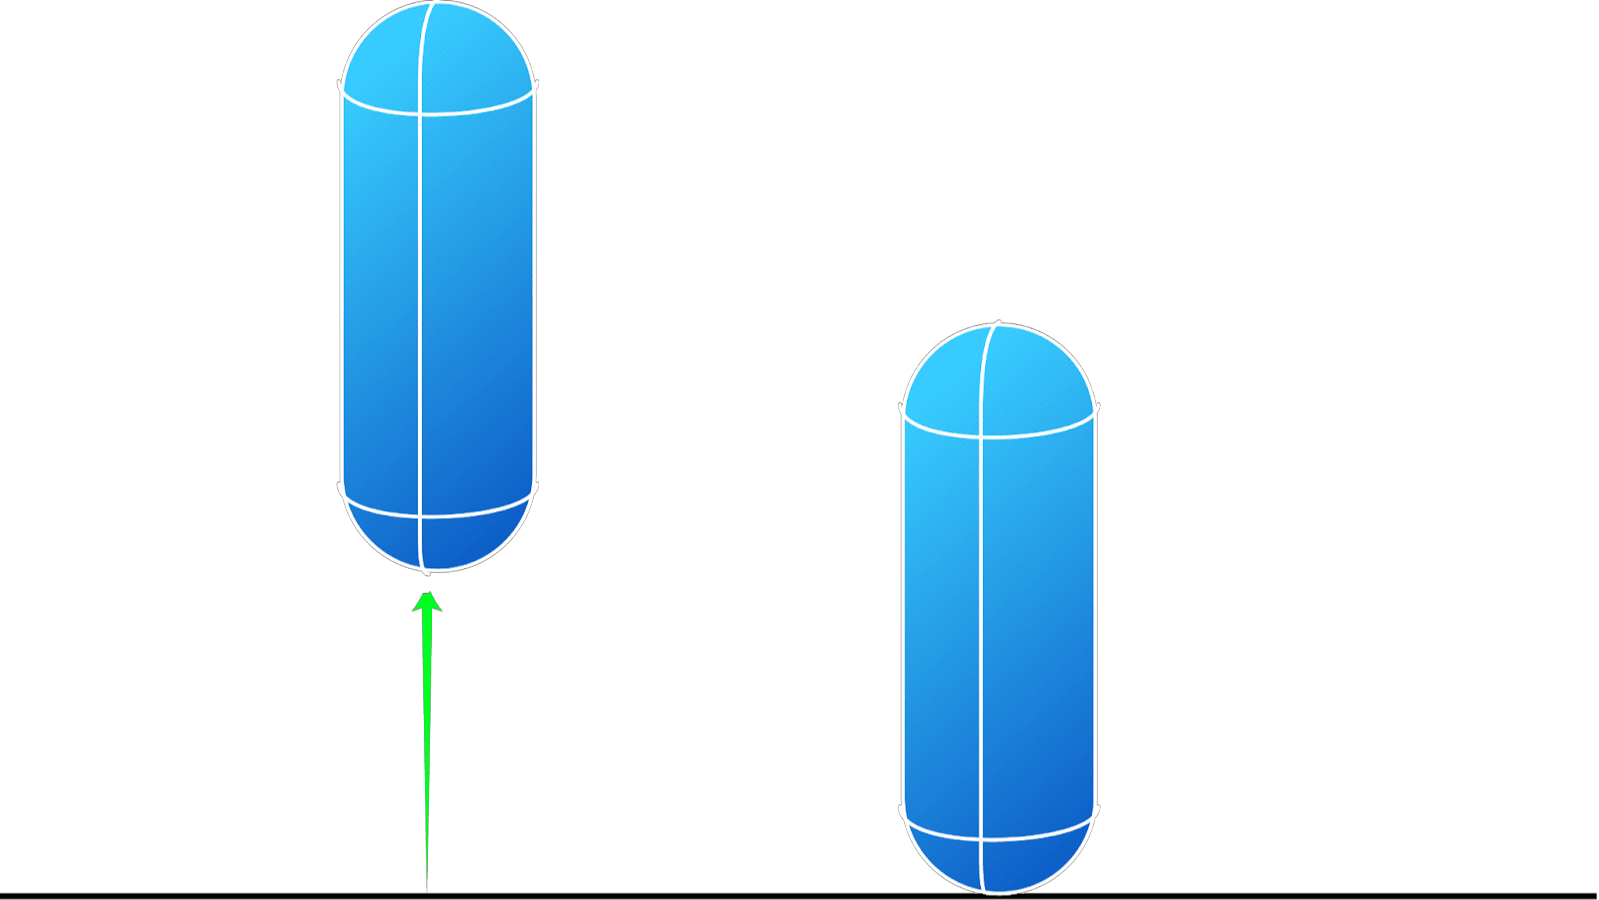
Left Capsule successfully jumped because its input was buffered.
Now we’ve successfully jumped as soon as we landed, but there’s one final touch when getting our friendly invisible hand to help out. Which is adjusting our Effective Jump Arc.
Effective Jump Arc
The Effective Jump Arc is the volume through which the player travels over time while jumping. If you’ve ever run into a position where you’re happy with how high your jump can go, but you’re still having difficulty clearing hurdles easily, it's because your Effective Jump Arc is taking up too much space.
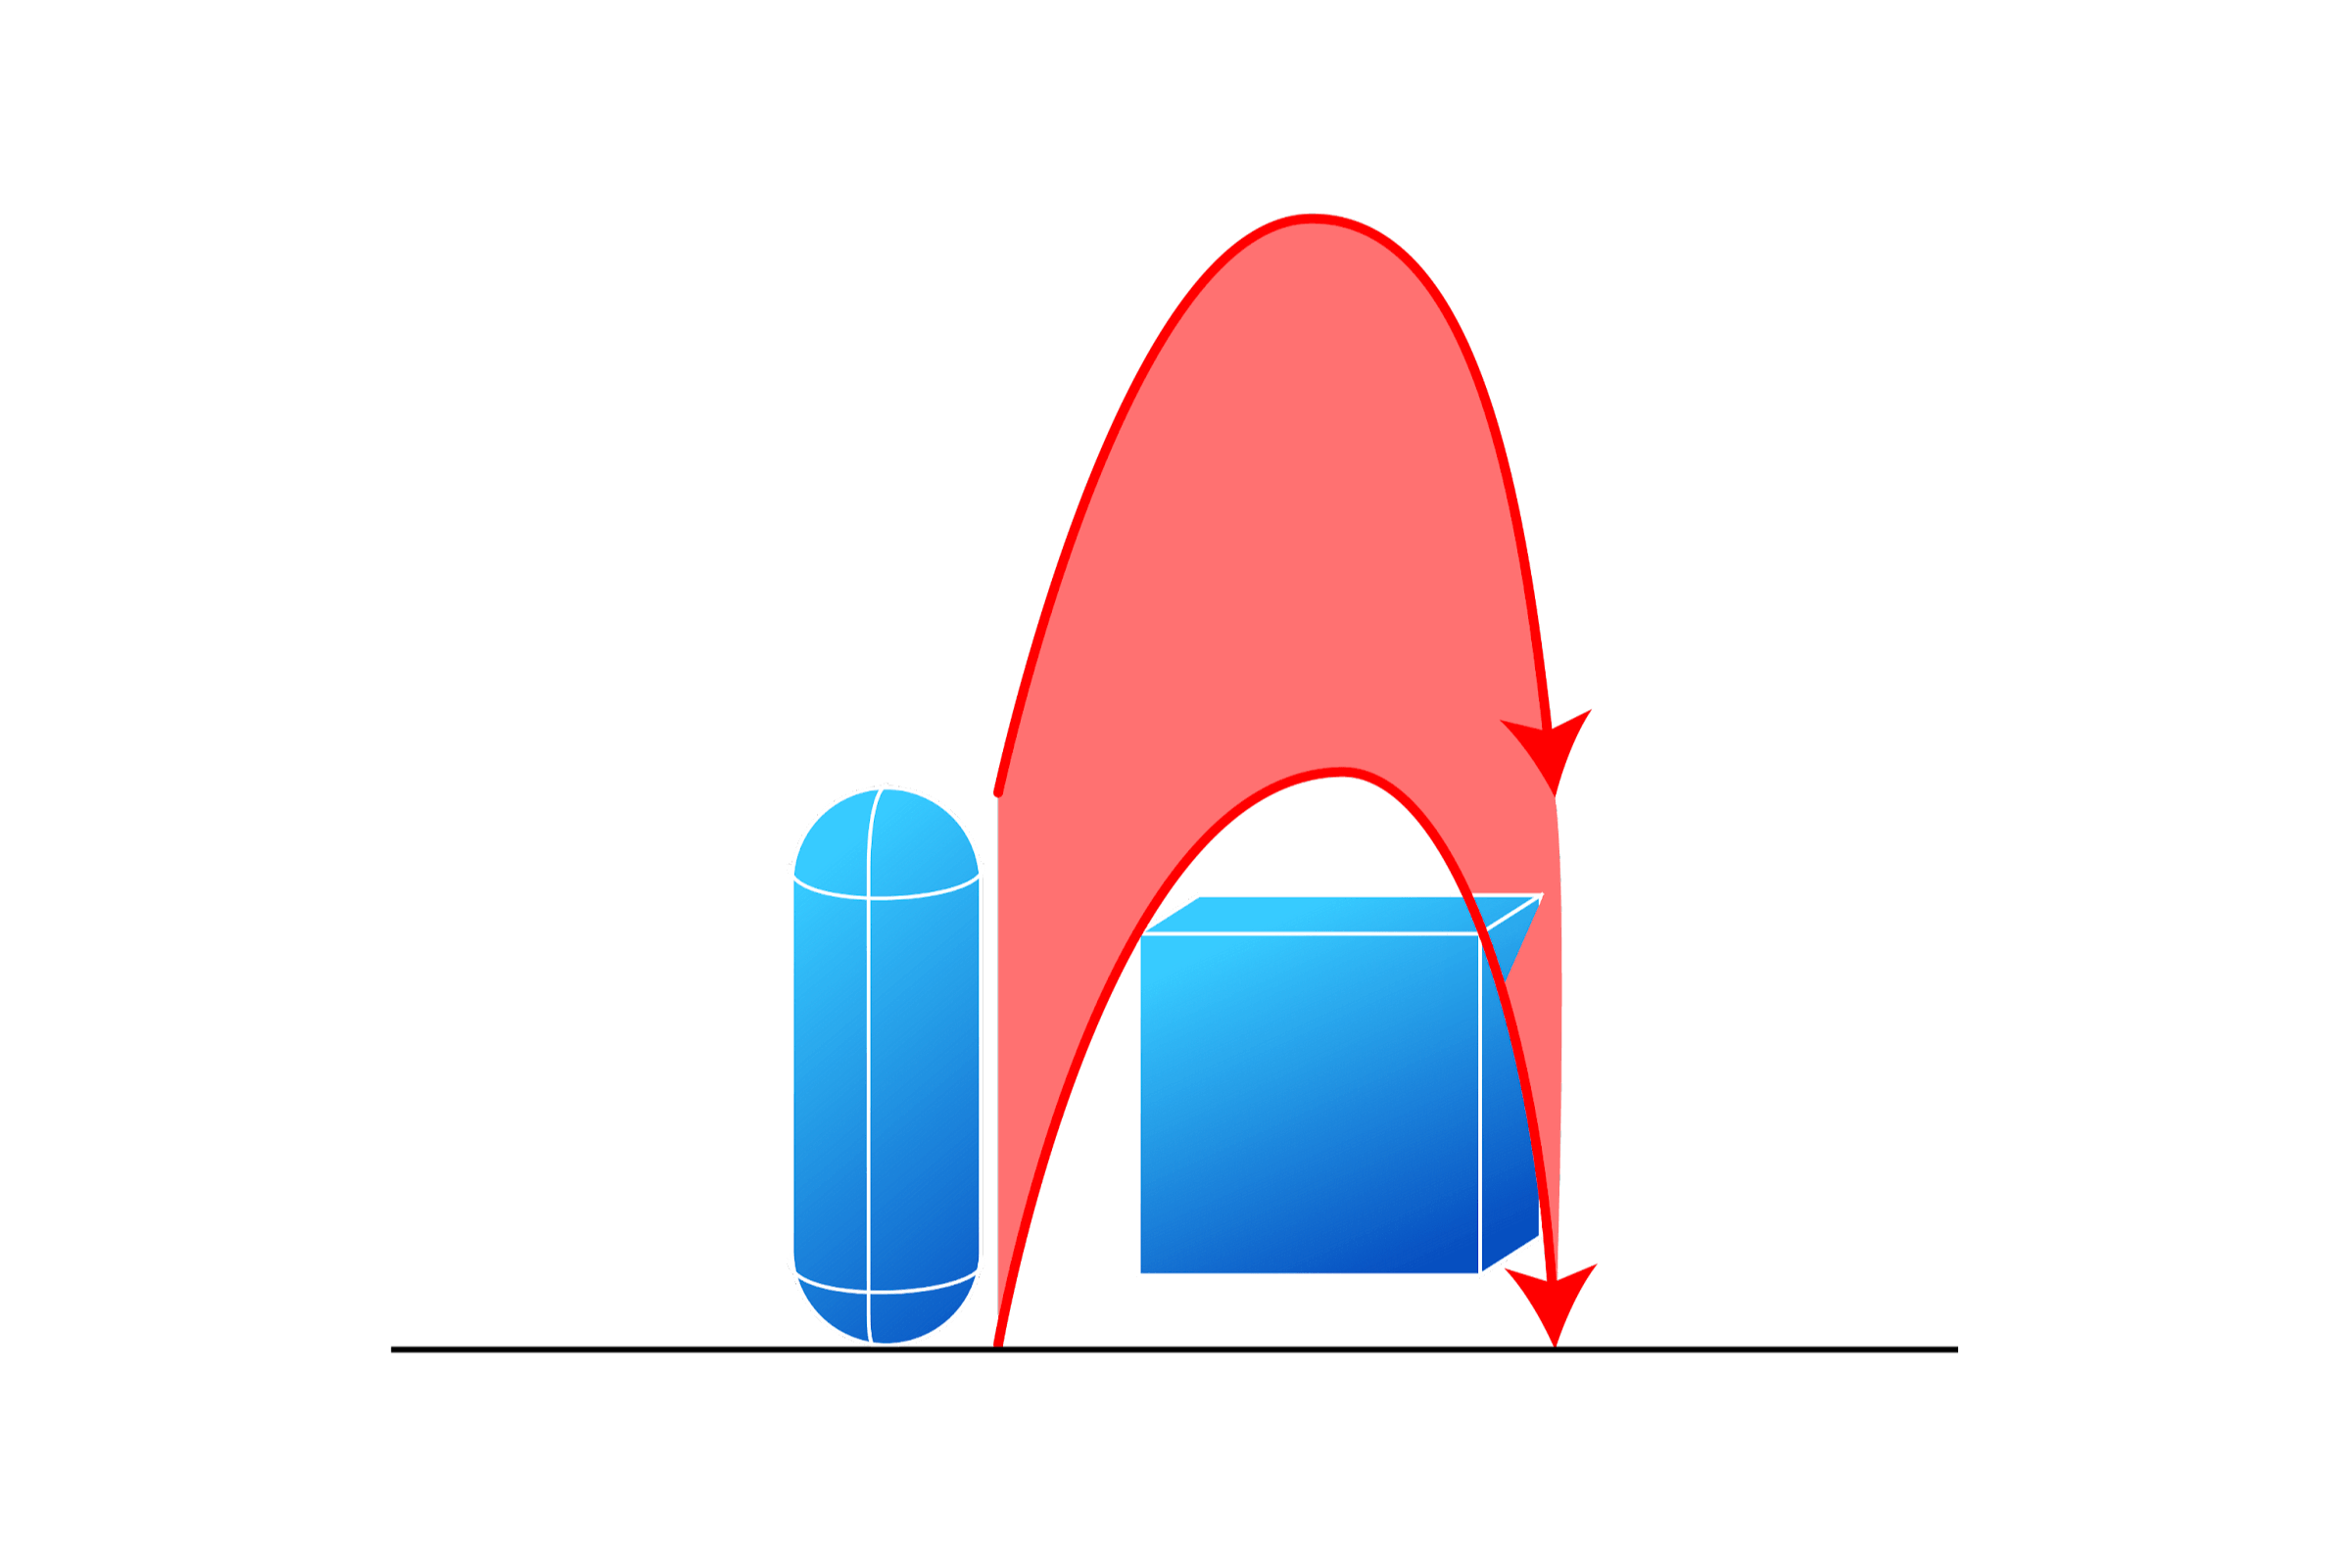
This fix doesn’t force you to just make you jump higher. Instead of increasing the upward velocity, it's possible to bring the bottom of your collider upward, while also making the overall height shorter. This motion simulates the bringing up of your feet while you jump, making your Effective Jump Arc smaller.
Here’s what that would look like if our player was standing still while jumping:
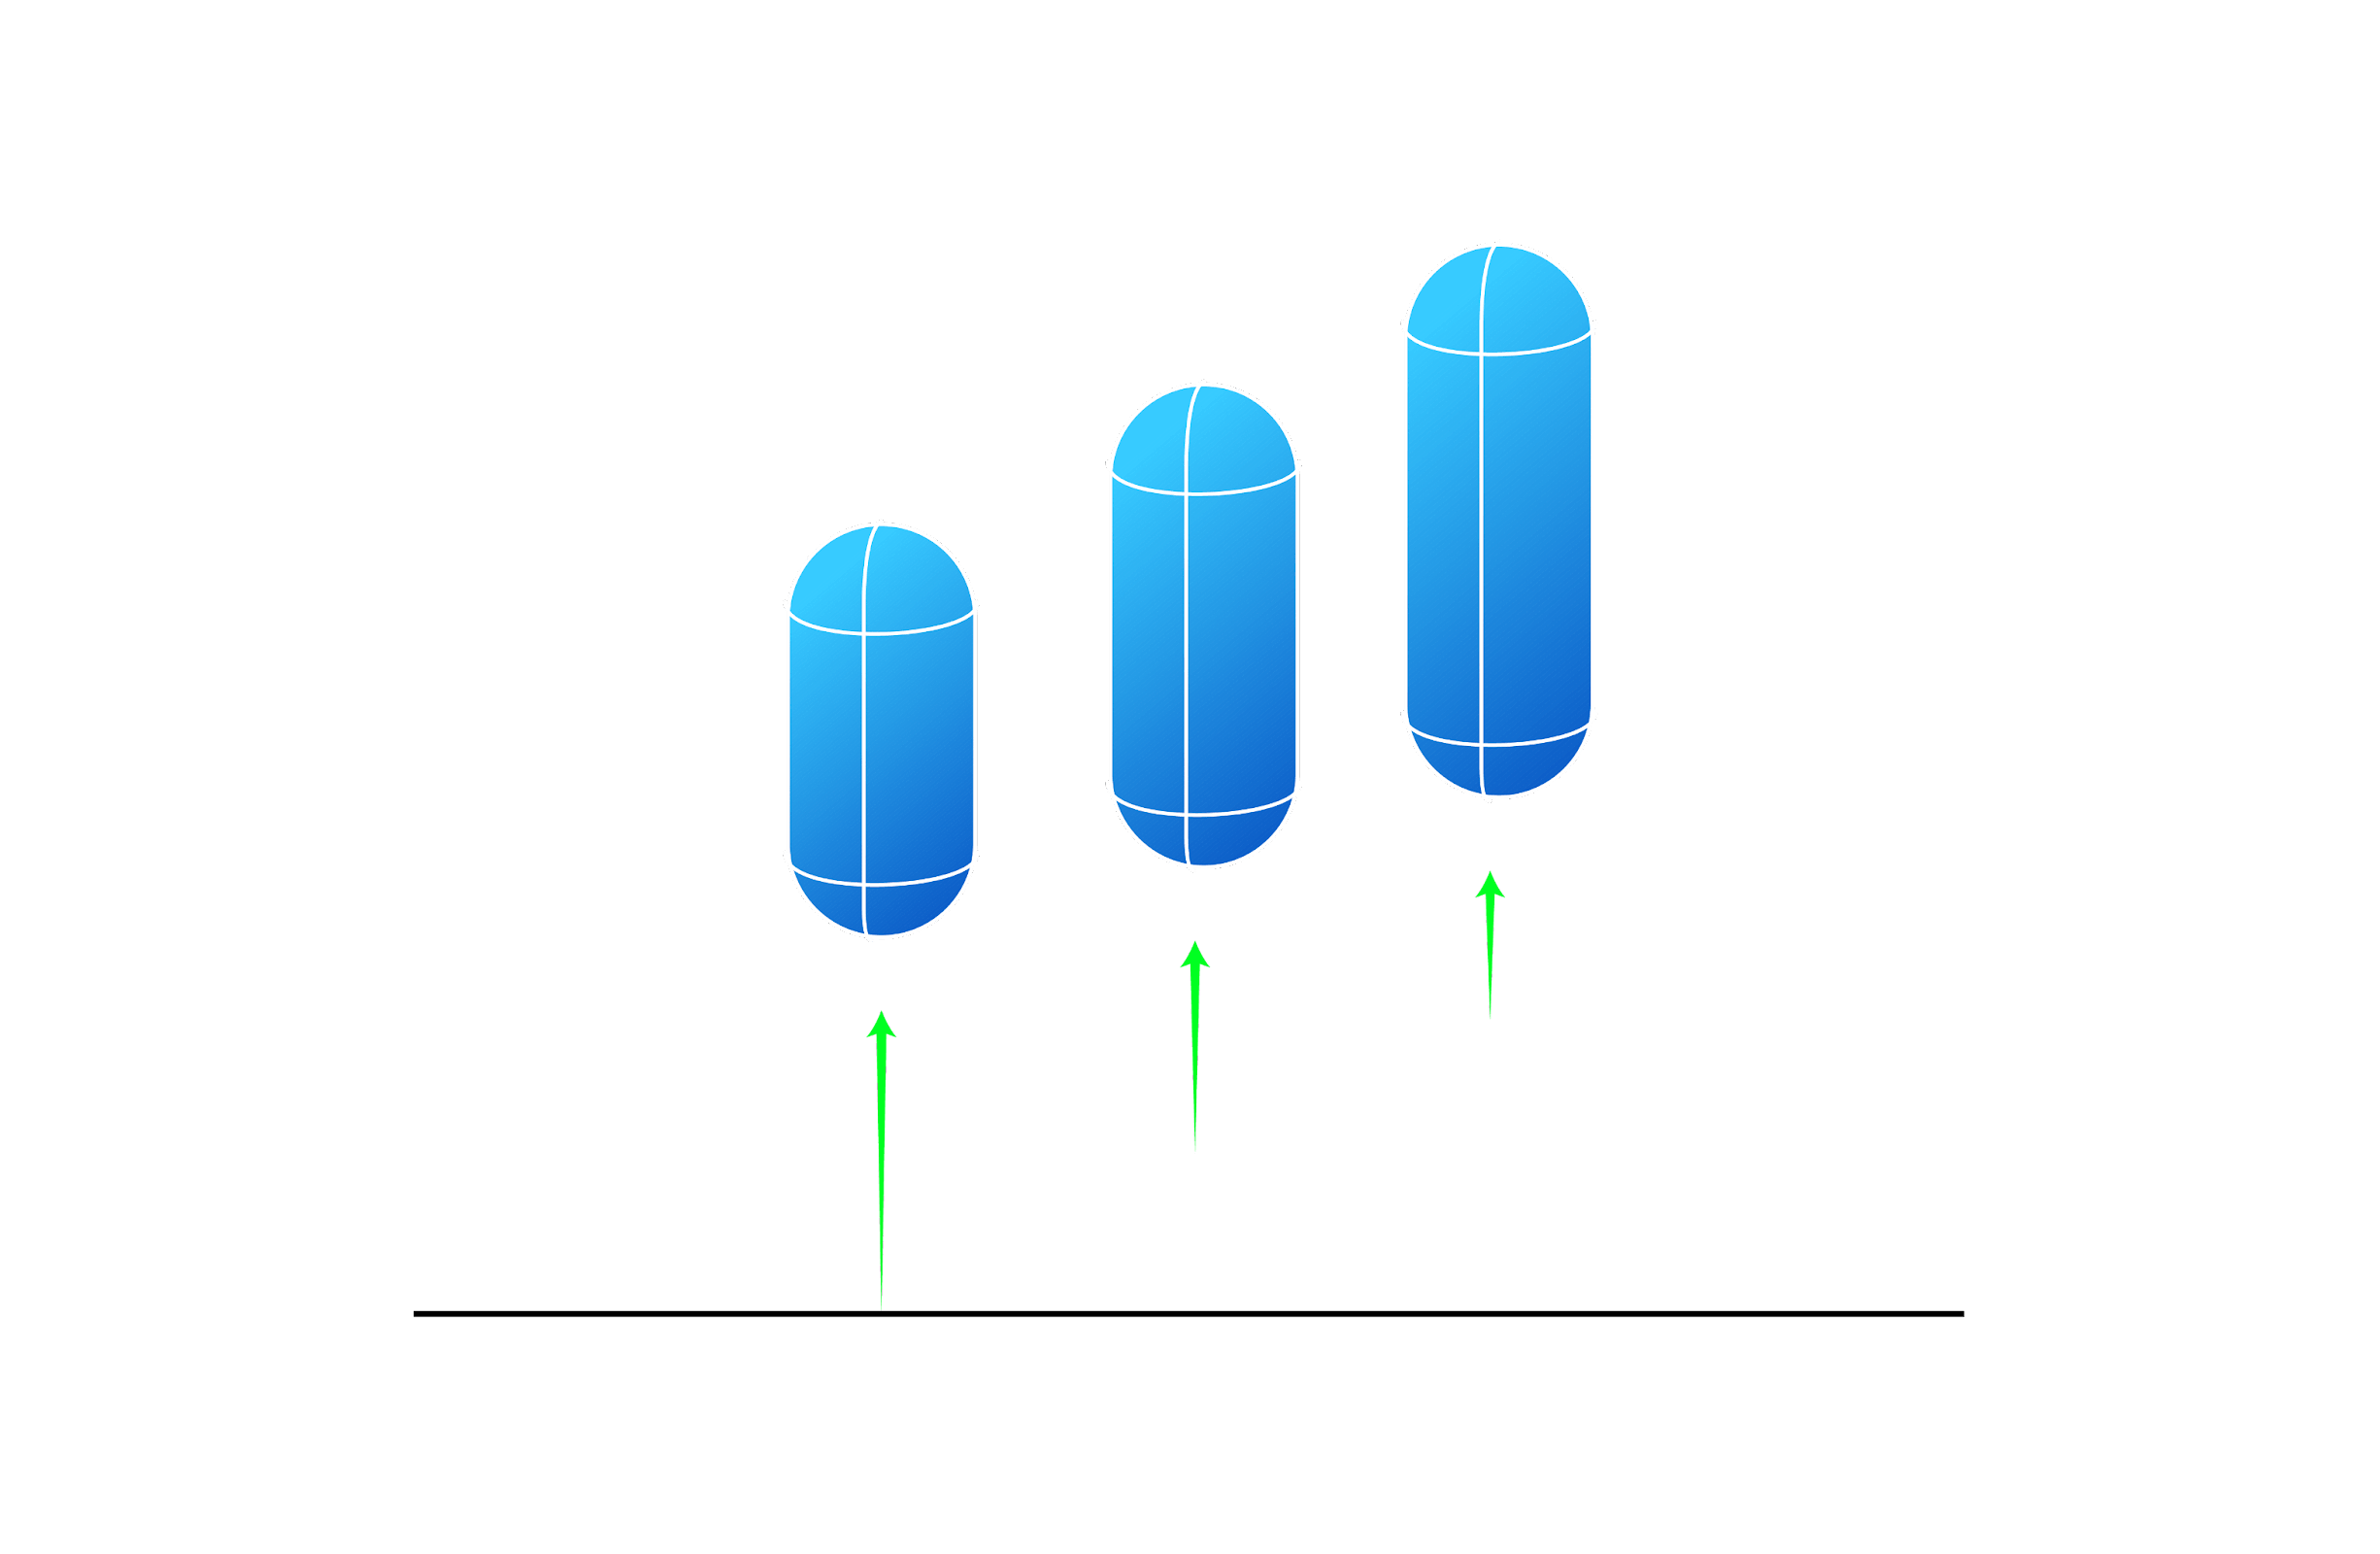
The green vector represents velocity, the greater the magnitude of your velocity vector, the shorter your player will be. Obviously this should be capped so you don’t unintentionally shrink yourself down to microscopic levels when you jump (unless you want that—could be a cool game). If we apply this change in motion it’s very easy to see how changing the Effective Jump Arc affects platforming.
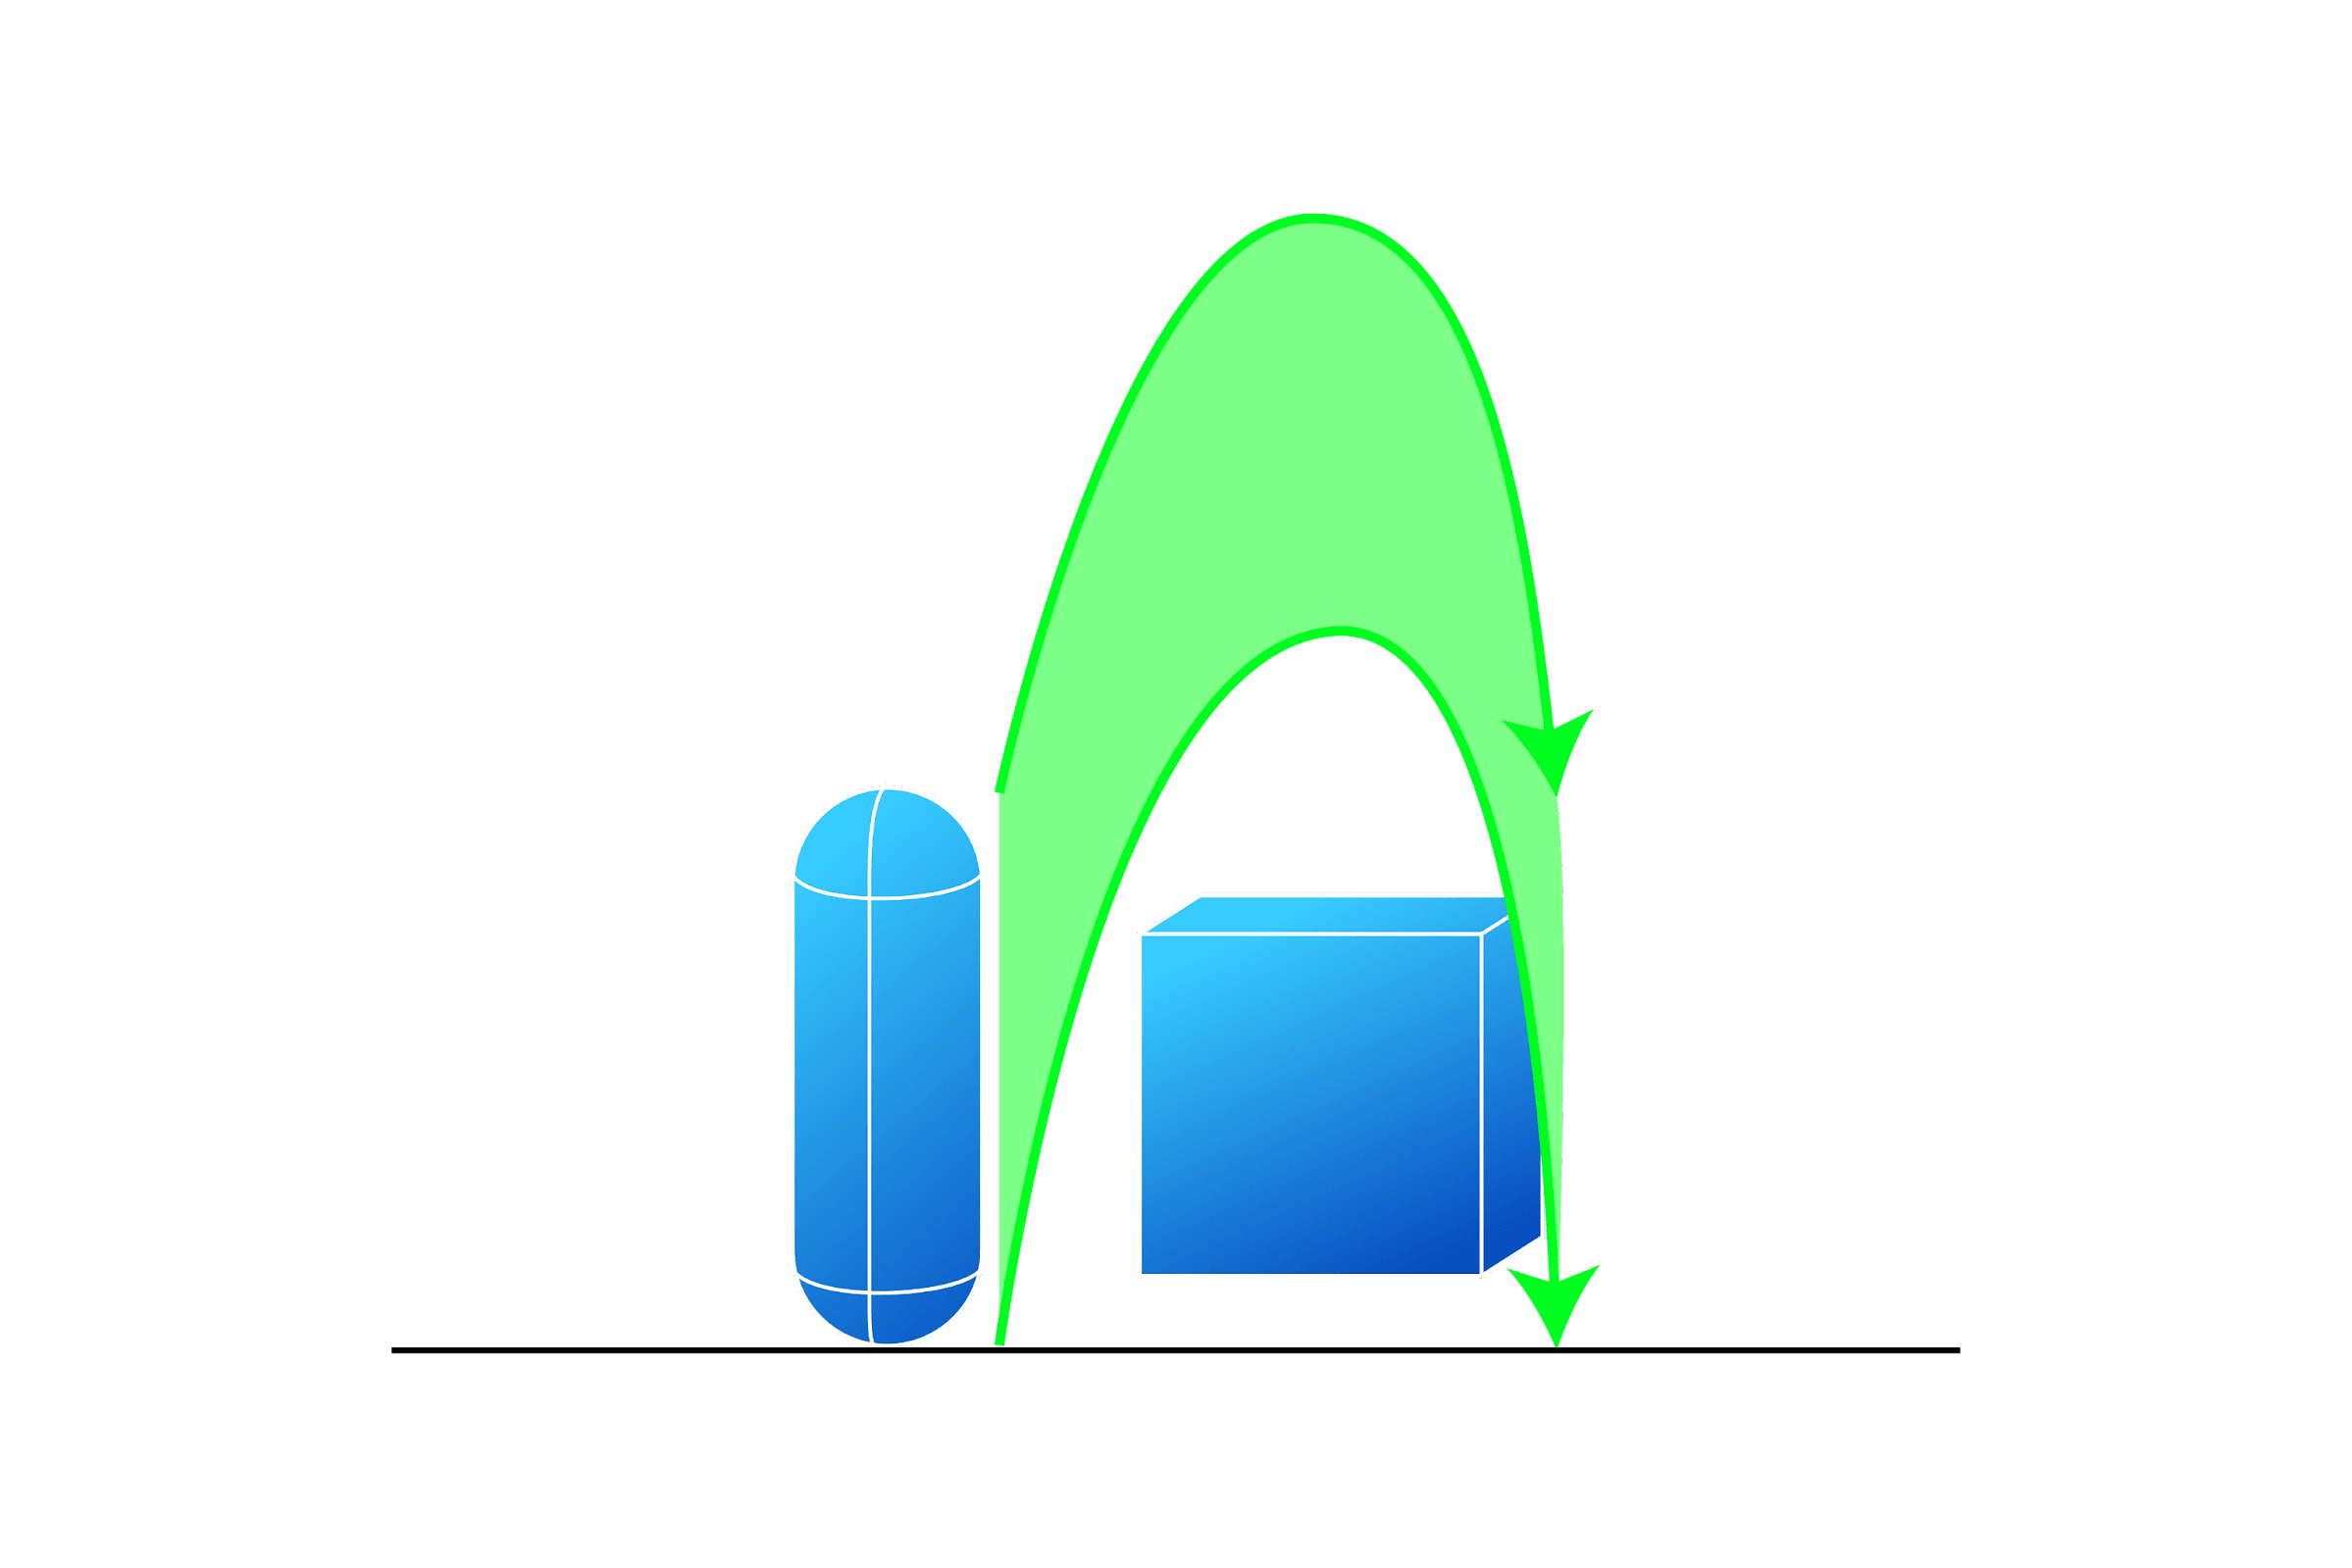
It’s now much easier to clear that somewhat small obstacle. It’s the same idea as a crouch jump in a first person game, but we’re doing it automatically based on the upward velocity;
And that’s it! Combining all of these tools together eliminates many friction points when your players traverse your game worlds. Now go forth and share your knowledge to your players’ benefit. Thanks for watching, be sure to like, subscribe and ring that bell icon.
Ready to learn more?
Give our team a call on (972) 299-8937 or set up a no obligation consultation through the button below.